-
Created by
 Tarot Redhand on Mar 02, 2018
7 minute read
Tarot Redhand on Mar 02, 2018
7 minute read
Workin' in a coal mine
Goin' down down down
Workin' in a coal mine
Whoop! about to slip down
Working In A Coalmine - Allen Toussaint composer 1965
The Fernesk Mine
So the second tutorial. For this one we build a new area. At first glance this second one is much better than the first. So go ahead and follow it until you've got the module open and maximised in the toolset.
OK, got it open? Just a few comments here on the steps 2 and 3.
- 2. There is an alternative way to open the area wizard. In the left hand panel of the toolset, right at the top of that panel, there is the word 'Areas'. This gives you access to all the areas that you create in the module. However if you right click on that, a single choice menu will open - 'New'. Clicking new will bring up the area wizard.
- 3. It is very important that you enter a name here and don't just accept the default one provided "Area 001". Even though you can change the name at a later date, as far as the toolset is concerned the name you give at this stage is the name that it will always know it by. While this is probably not a problem with your first module, it can cause problems when you make modules you design yourself.
Those little notes aside, proceed to and read the section marked 'Tip:'. There is one little thing they omit to tell you here. Exactly how to find the things they are telling you to switch off. Don't panic. Along the top of the toolset, directly underneath the horizontal menu, there is a toolstrip (a line of icons that make the toolset do something when clicked on). This toolstrip is divided into sections by vertical lines. The section you want for the 'Tip:' instructions is on the far right of the toolstrip. Finding the ones you want is relatively easy. Just hover your mouse pointer over each in turn to reveal a tooltip for each one. This tooltip tells you the name/function of each one in turn. Now that you have found what you are looking for, there is a good chance that they are already in the off position anyway. This doesn't really matter because at least now you know where to look in future.
Follow the instructions until you get to number 7. Now if you follow the words of the instructions there is a good chance that you will place the feature in the wrong place and open a big hole in the side of your mine. If you do so, Don't Panic. Just hit the undo button on the toolstrip once to remove the offending hole. Re-select the feature and rotate it (see previous tutorial). Now the correct position for this feature is on the bottom row and one square in from the left (i.e. the square next to the corner square).
Finish the instructions on this page and go to the next. Good they finally tell you about the numbering of the squares. Instruction 8. You may initially struggle to find a place where the toolset will allow you to paint the rails. Don't panic. With a little trial and error the bounding box (that I told you about in the previous entry in this series) will turn from red to green. Also, remember that if you do go off the edge of the map, that pressing undo once will remove the last thing that you did.
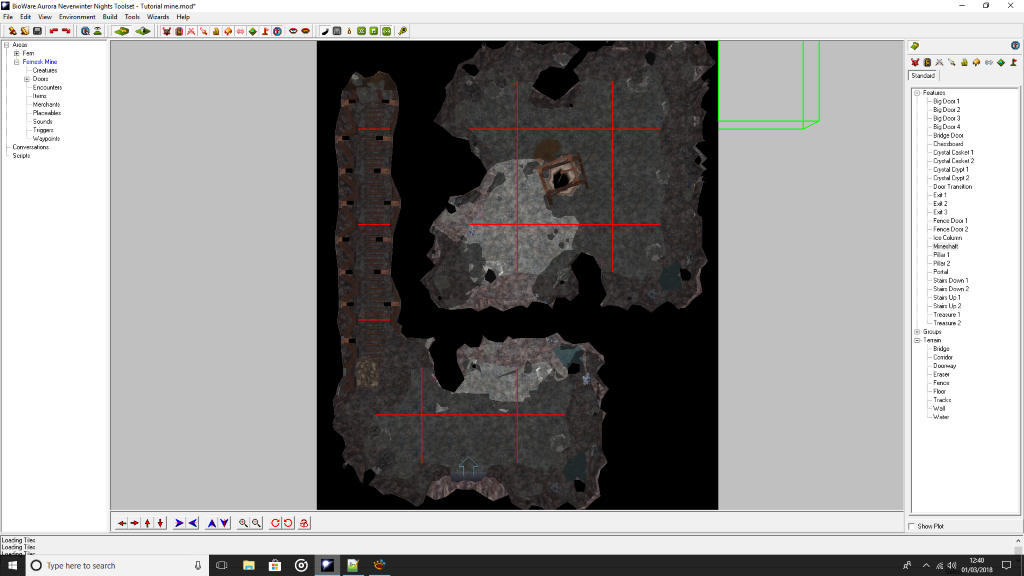
Instruction 9 seems pretty clear. You should now have something that looks similar to this in the toolset. So onwards.
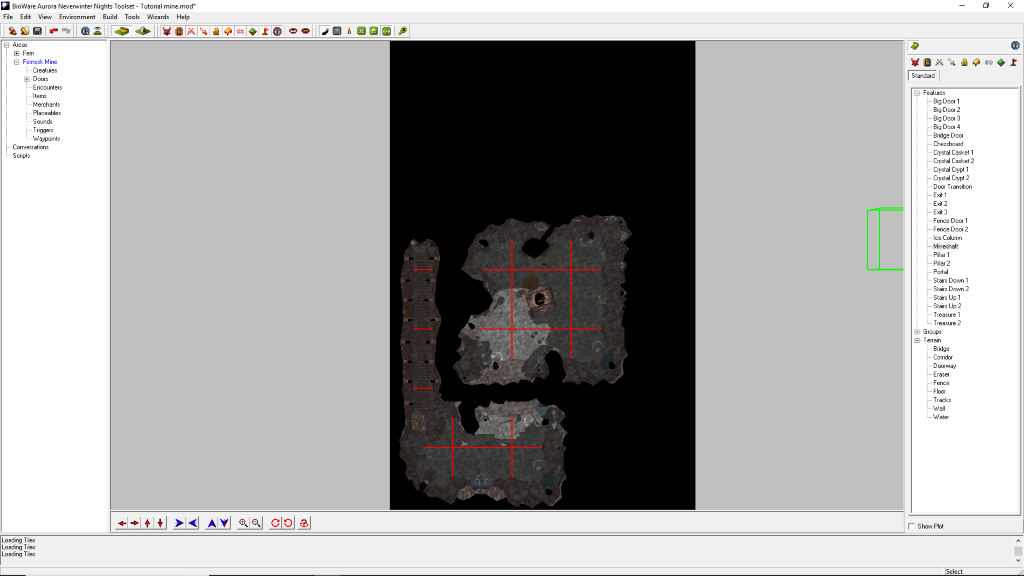
Next we come to Advanced Area Manipulation. Before proceeding save. This section doesn't seem to need further explanation so go ahead with instructions 1 and 2. After the resize, my version of the area looks like this -
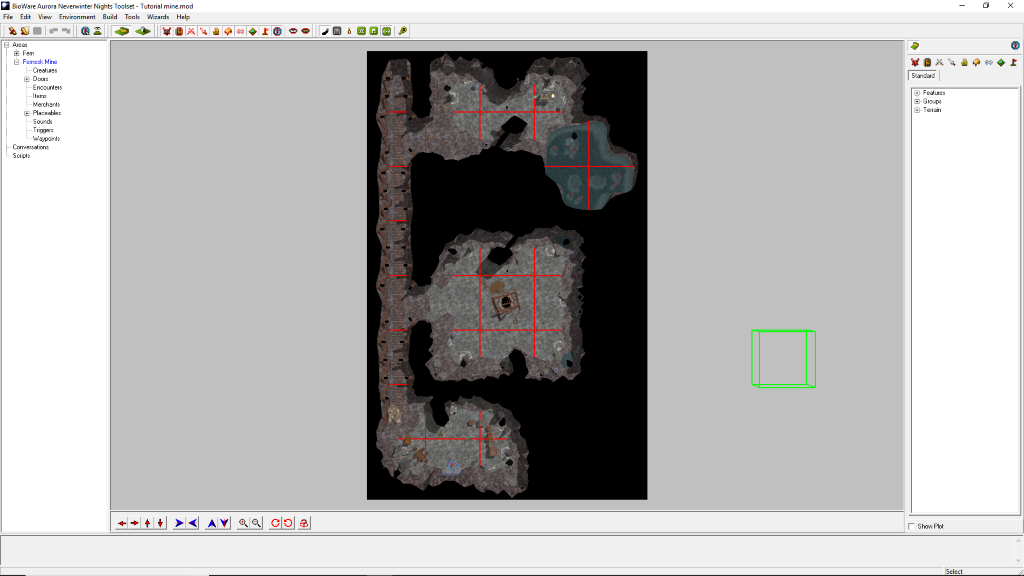
Carry on until you have done all the instructions in this section up to and including number 6. Now place the module start point as instructed in the sentence that follows instruction 6. Save again.
At this point my area looks like -
You are now told to close the toolset so that you can test it in game. Don't. Instead remember what I told in part one of this series and press F9 instead. Once you have finished wandering about inside your mine and exited NwN, you will find the toolset, ready to continue, on the task bar. Once you do that we will be in a new section of Tutorial 2. See you there.
This new section introduces you to placeables (we no longer use the hyphen). You can regard placeables as "set-dressing". Those little (and sometimes not so little) things that make an area feel as though it is actually in use. Right, back to the tutorial.
Read all the way to where it says "Place-able Objects". If you pressed F9 like I said, you can ignore instructions 1 and 2, going to number 3 instead. Before you actually follow instructions 3 and 4, I recommend that you zoom in to the part of your area that contains the mine exit. It will make it so much easier to see what you are doing and to follow those instructions. One other thing. There are actually 4 tables to choose from. I recommend that you use the third one in the list. Instruction 5 tells you to add some chairs. Thing is there are 5 different chair designs. I suggest that the third one in the list is the one to use. I would also suggest that you only arrange them loosely to start with. Rotate them as the text suggests before moving them closer to the table.
I don't think you should have any problems with the next few instructions so go ahead and follow them all the way up to and including instruction 10 including the "Tip:".
Save again then follow the instruction to check out your work in game but use F9 to do so.
Once you've had a look around your area we move onto a new section of the tutorial - Encounters. Read all of the introduction to this subject. That is everything before the numbered instructions. Even though those instructions may give the impression that this is only important for persistent worlds and multi-player, this isn't so. Those comments in the tutorial are just as applicable for single player games as well.
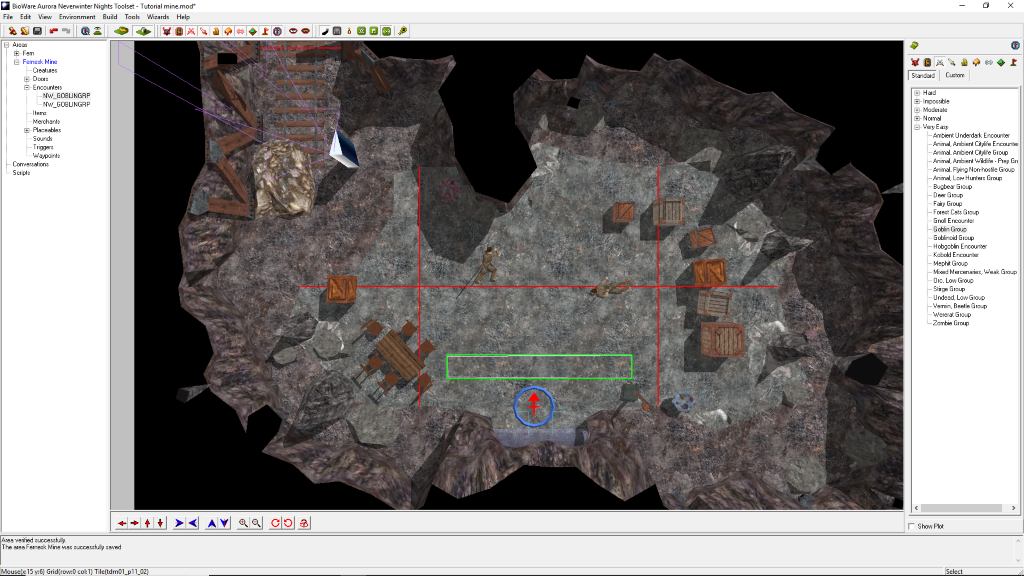
Assuming that you returned to the toolset after you used F9, you can safely ignore steps 1 and 2. Now before you follow instructions 3 to 5 I suggest that you zoom in to that part of the area containing the mine exit. This will make it easier to do what you are told in those instructions.
Follow all the instructions for the rest of this section. One little oddity to be aware of. When creating the trigger you may notice that on the third point that you click, the toolset will automatically connect these three points as a triangle. This is not what is needed and can be safely ignored. Instead place your fourth point and double click to finish creating the encounter trigger.
A little note on Spawn Points. Simply this, please try to always remember to place these. Without them any monsters that spawn in due to an encounter being triggered will do so almost on top of the PC that triggered it. Which is one sure way to break immersion.
Once you have followed the instructions and created the two encounters save your module. Now test it. Remember to make the PC put on any armour they have and to arm themselves before they take a single step.
Once you have finished testing your encounters out, we'll move on to the final part of this section of the tutorial - Creatures.
As usual F9 use equals skip 1 and 2. The only small thing to be aware of is that there are in fact 2 different goblin shamans in the toolset. You need to select the first one. Apart from that, there are no other things to be aware of. So go ahead, follow all of the instructions from number three onwards. Then save your module and test it.
Lastly, we might as well do the Extra Credit part as well, if for no other reason than it is good practice and it will add to the interest level of the module overall. The actual name of this extra encounter in the toolset is "Undead, Low Group", otherwise you should have no problems with it.
And that's it for this part of the tutorials.