Tutorial 3: Doors and Area Transitions
Tutorial 3 in the module building tutorial document is short compared to the previous two tutorials. That is reflected in this part of the series. The tutorial itself is split into three parts - Doors, Area Transitions and Loadscreens.
Doors
For once there is nothing contentious or in need of extra comment on the body of this tutorial section so read what the tutorial tells you and do as it instructs. Then come back here before you progress onto the section about area transitions.
Now you may have tried one or perhaps two different tileset-specific doors when you were instructed to do so. Did you notice that it/they had the same appearance? That was because the inn doesn't use a special door. All tileset-specific doors are for specific places like a barn where it is actually a double door.
Now for my first tip for Part 3. So far you have probably only painted a single door, the one for the inn. Have you got any other buildings in your area? If so you really should go around and place doors in them as well. Nothing shouts "Newbie Builder" louder than an area with gaping holes where doors should be. While you're at it don't forget that the inn has two doorways. One at the front of the building and one at the back. One other thing. Quick tip here. Looking down on an area, all doorways are indicated by pale blue wireframe arrows. A word of caution though. Not all doorways take doors (e.g. some cave entrances/exits). You will find it easier to place the doors if you use the camera controls you were told about in the very first lesson in the tutorial document. The controls that let you pan up and down, rotate and zoom.
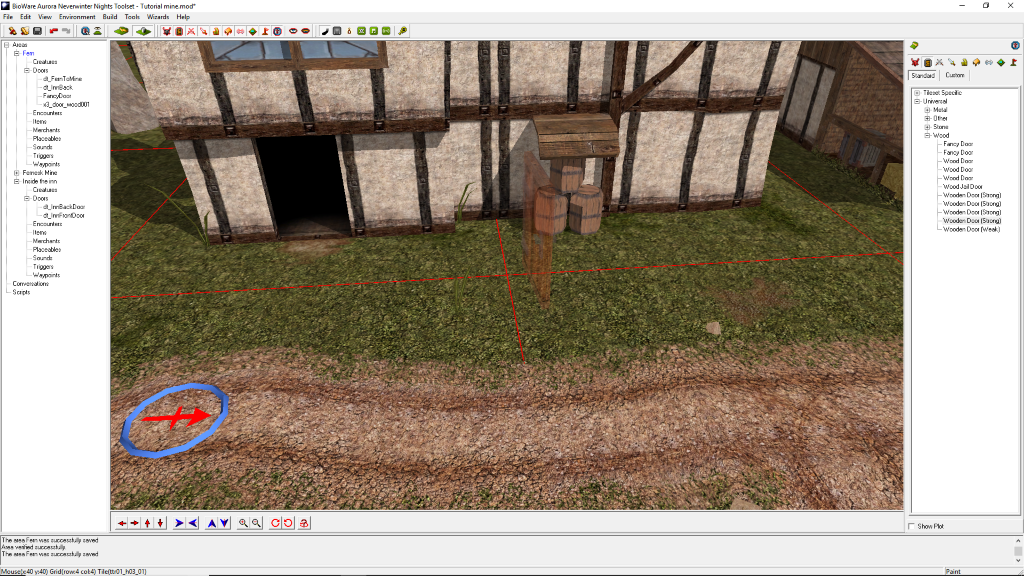
If you think you have placed all the doors in the Fern area, we need to double check this in game. So place the module start just outside the inn and save the module. Press F9. Once in the module just walk around looking at all the buildings, checking that indeed you do have doors in them. If you do come across an empty doorway, make a note of its location and exit the module. Fit a door in the hole, save and re-enter the module. Keep doing this until there are no missing doors. This may seem like a chore for such a simple module but it really comes into its own when you are building city areas with many doorways some of which may be tucked away in out of the way locations.
Area Transitions
Moving on to the section on Area Transitions. Start the instructions. Instruction 2 tells you to "Select the door in the entrance". If you are having difficulty in finding this "door" that is because strictly speaking there isn't one. What they are actually talking about is the cave/mine entrance/exit. The easiest way of selecting it is to use its entry in the doors section of the Fernesk Mine in the left hand panel under areas. Proceed onwards up to and including instruction number 4.
Instruction 4 can be confusing because they talk about a "script tag". What they actually mean is the TAG. So now you know what they mean when they use that term further in this tutorial. Getting on to what you are told to do. They tell you to change the tag instead of the name because that is what shows up in the left hand panel. Now adding dt_ to the left of the tag is purely for your convenience, it is not strictly necessary. Doing it that way means that you will be able to tell at a glance those doors that have an area transition attached to them.
Apart from that you should now have enough experience to not encounter any difficulties with the rest of this tutorial. So carry on until you reach Extra Credit.
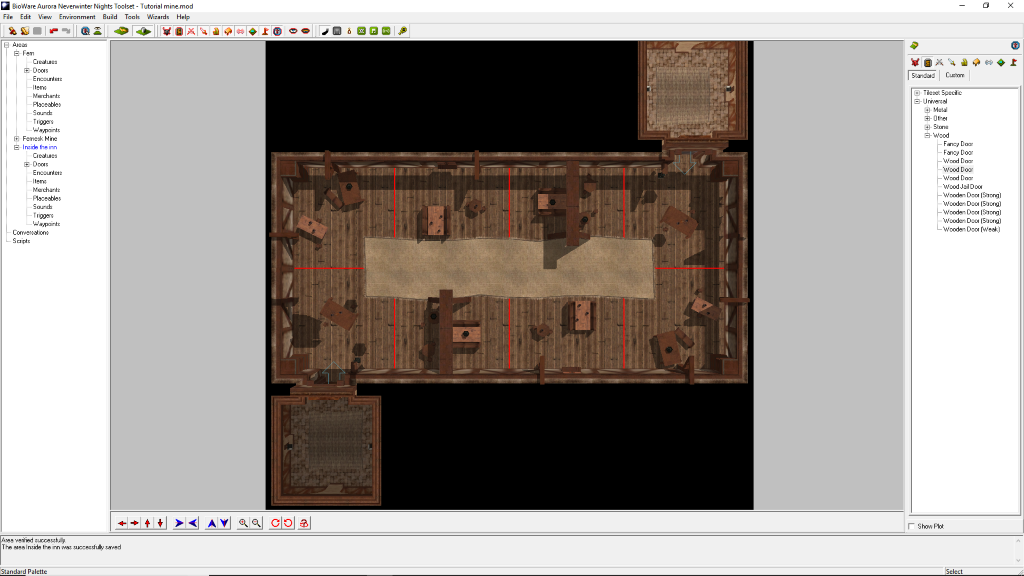
In the extra credit they tell you to do something that's a bit strange. First they tell you to create the interior of the inn. Then they tell you to lock the door. So how are you supposed to test the inn's interior in game? I am going to tell you to deviate from their instructions at this point. By all means create the interior using the tileset they tell you to use. Now add the doorways and doors, so you can get in and out of the inn. Finally set up the necessary area transitions. Save and F9. Make sure you can go in and out of both the inn's doors.
If you haven't got any other buildings than the inn on the Fern map, add another one. Add a door to it. Now you are set up to lock a door and still be able to go into and out of the inn. So follow the instructions on locking doors but use a door that isn't attached to the inn. As they haven't told you about certain things (and I am following along just dealing with what they have told you) you won't be able to supply any sort of "key" to unlock the door at this stage. So for now you can ignore that.
Save and F9 to verify that the door is indeed locked.
That's it. Part three is done.